Klipper on Android を試してみた
KlipperをAndroid上で動かす
3DプリンターをKlipper化するにあたって、必ずしもラズパイが必要というわけでもありません。
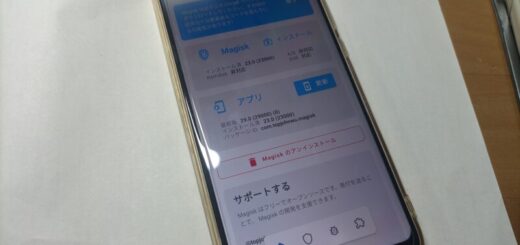
余ってるPCでもいいし、なんならrootが取れてれば使い古したAndroidスマホでもいいらしいので試してみました。
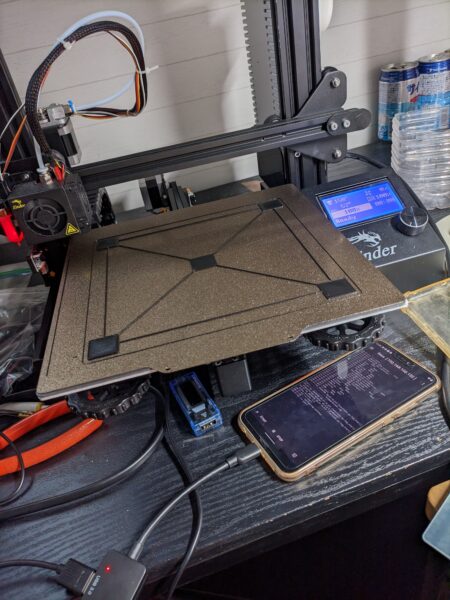
用意したスマホはこれ
環境
- Ender-3, v4.2.2マザボ
- Huawei P20 Lite, LineageOS 18.1(Android11)
- 適当なOTGケーブル (相性ありそう?いけるやつとダメなやつがあった)
これを使用します
https://github.com/gaifeng8864/klipper-on-android/blob/main/README_en.md
Linux Deploy で Debian をインストールし、その上で Klipper, moonraker, fluidd, KlipperScreen を動かすようです。
XServer-XSDL で KlipperScreen の画面描写をしてるみたい。
kerneladiutor は LinuxDeploy 上からCPUが全コア認識されてないとき入れろと書いてます。/proc/cpuinfo見たら8コア全部認識されてたので、自分の環境では不要そう。
環境構築
とりあえず上のREADME通りに 5. Install klipper using kiauh まで済ませて、Ender-3側のKlipper Firmwareをビルドしました。
klipperのディレクトリに移動してから make menuconfig するとウィザードが出てくるので、 STM32F103, 28KiB bootloader, serial (on USART1 PA10/PA9) を選択して、makeします。
出来上がったファームウェア out/klipper.bin をFAT32でフォーマットしたMicro SD(8GB以下がいいらしい?)にコピーして、Ender-3にぶっ刺して起動するとファームウェアが焼けます。(ディスプレイには何も表示されないのでちゃんと焼けたかどうか確認できない…)
繰り返し焼かれるのを防ぐために、マザボには最後に焼かれたファームウェアファイルの名前が記憶されています。その条件にマッチする時は焼かれません。もしklipper.binという名前で直前に別のものを焼いたなら違う名前にする必要があります。
デバイスが認識されない
ここからが問題で、OTGケーブルを介して3Dプリンターに接続しても何も反応なし。/dev下に何も現れませんでした。
どうやらLinux Deploy側にCH341ドライバがないのが原因っぽい。
対処法として、Octo4aアプリにこのドライバが独自実装されてるらしいので、それ経由でアクセスする方法がある。
具体的には、Octo4aアプリを起動した状態で接続すると、Android上の/data/data/com.octo4a/files内にデバイスファイルが現れるので、そこをLinux Deploy上にマウントポイントとして渡すことで実現します。
とりあえずOcto4aアプリを入れてみると、Printer is connectとなり認識はされた。後は以下の通りに設定します
以下引用
https://github.com/d4rk50ul1/klipper-on-android?tab=readme-ov-file
- Find your printer’s serial device for use in Klipper’s
printer.cfg:
It will likely be/dev/ttyACM0or/dev/ttyUSB0. Check if either of those appear/disappear under/dev/when plugging/unplugging your printer.If you cannot find your printer in/dev/, then you can check Octo4a app which includes a custom implementation of the CH34x driver. IMPORTANT: You don’t need to run OctoPrint within it so once in the main screen of the app just stop it if it’s running. To do this:- Install Octo4a from https://github.com/feelfreelinux/octo4a/releases
- Run Octo4a and let it install OctoPrint (optionally tap the Stop button once it’s done installing).
- Make sure Octo4a sees your printer (it will be listed with a checked-box next to it).
- There will be a prompt in your android device asking for permission to connect to your printer if detected.
- Now you need to go back to Linux Deploy and edit the container settings:
- MOUNTS:
- Enable:
yes - Mount points: press on the “+” button
- Source:
/data/data/com.octo4a/files - Target:
/home/android/octo4a
- Source:
- Enable:
- MOUNTS:
/home/android/octo4a/serialpipeis the serial port you need to use in yourprinter.cfg
この設定が終わった後、Linux Deploy上に戻り
$ sudo chmod 777 /home/android/octo4a/serialpipeとするように書かれていますが、これでは不十分でした。
$ sudo ls -al /home/android/octo4a

total 15
drwx------. 3 10244 10244 3488 Jul 23 21:28 .
drwxr-xr-x. 3 root  root  3488 Jul 23 21:34 ..
drwxr--r--. 6 10244 10244 3488 Jul 23 21:28 bootstrap
-rw-------. 1 10244 10244   45 Jul 23 21:27 device-id
lrwxrwxrwx. 1 10244 10244   18 Jul 23 21:27 serialpipe -> /dev/pts/0
serialpipe は /dev/pts/0 のシンボリックリンクのようです。(再起動したら0の部分は変わることがある)
こいつを見ると
$ sudo ls -al /dev/pts/0
crw-------. 1 10244 10244 136, 0 Jul 26 13:31 /dev/pts/0
こっちは777になってません。
$ sudo chmod 777 /dev/pts/0再起動毎に実際のデバイスファイル側に777を付けてあげる必要がありそうです。
あとは元のREADMEのほうにこれをやれと書いてましたが、デバイスファイルの所有者はaid_radioじゃなかったのでやる意味あるかどうかは不明です
sudo usermod -a -G aid_radio print3D環境構築のつづき
READMEの 6. klipper family bucket configuration から。
printer.cfg以外のconfigを持ってくる
sudo wget -P /home/print3D/printer_data/config/ https://raw.githubusercontent.com/gaifeng8864/klipper-on-android/main/fluidd.cfg
sudo wget -P /home/print3D/printer_data/config/ https://raw.githubusercontent.com/gaifeng8864/klipper-on-android/main/homing_override.cfg
sudo wget -P /home/print3D/printer_data/config/ https://raw.githubusercontent.com/gaifeng8864/klipper-on-android/main/moonraker.conf
Ender-3用のprinter.cfgはこれ。Pressure Advanceはボーデン時の値が入ってるので注意。ダイレクトエクストルーダー環境では適切な値を設定してください。
https://gist.github.com/ExtNeon/bee6862ad71092278e1c6cf10ba91acd
[mcu]
serial: /home/android/octo4a/serialpipe
restart_method: command
シリアルをさっきのやつに指定するように編集してください。これをprinter.cfgにリネームして配置します。
次にスクリプトを動かします。Klipperの自動起動や電源最適化とかが設定されるみたい。
sudo wget https://raw.githubusercontent.com/gaifeng8864/klipper-on-android/main/configuration_klipper_family.sh

bash configuration_klipper_family.sh -p "/dev/pts/0"
指定するデバイスファイルはなぜか/home/android/octo4a/serialpipeではダメで、リンク先の/dev/pts/0を指定しました。
しかしスクリプトの中身を見るとデバイスが存在するかどうかの確認しかしてないのでどうでもよさそう。
終わったら再起動してください。
動作確認
起動時にLinux Deployが自動で走る前にOcto4aアプリが先に開いてないとダメなのかな?それに毎回 chmod 777 を走らせないといけないので起動時のスクリプト組んだ方が良いですね。
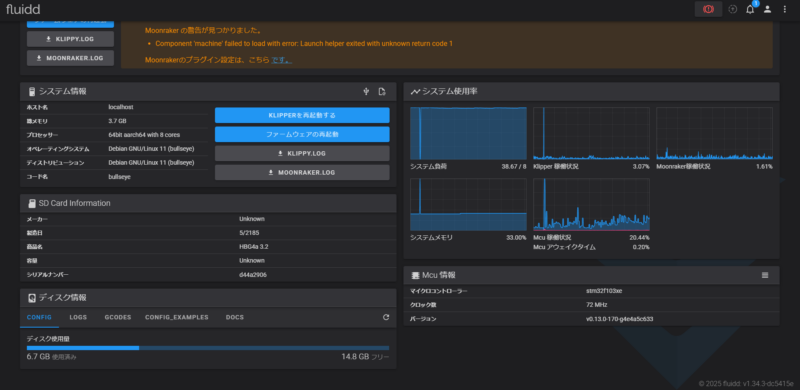
普通に動きました。

システム負荷はLoad Averageですかね?明らかに画面がカクついてるのでスペック不足かも


最近のコメント